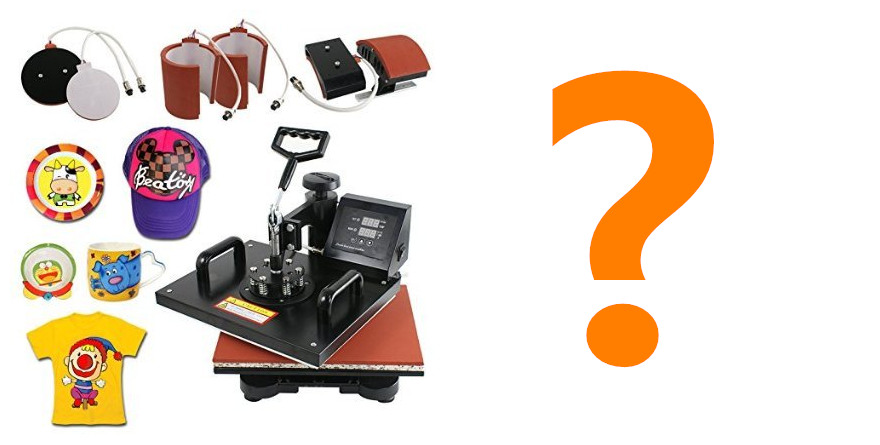
Are you ready to go into T-shirt or gift printing business? Gift printing is a great opportunity to make money, the only tool you need for this business is a quality heat press machine. Anybody can do this business; you don’t need a special college certificate or certification in engineering courses to start using heat press machine.
If you are ready to learn a no-fuss way of using heat press machine, this article will teach you everything you need to know. But before you do, remember to read our article on Best Heat Press Machine 2017: Buyers’ Guide, this will help you to put what you learn here into use.
What is Heat Press Machine?
If you are searching how to use heat press machine, you obviously know what the machine is used for. If you don’t, it is a modern way of printing artworks onto various items such as t-shirts, mugs, and even on papers to make them look unique and attractive. Heat press machine is also known as Heat Transfers Machine. Since this machine is not always expensive, it is a great way someone even on a low budget can start his own gift printing business.
Getting Started
Below is a complete guide on how you can use a heat printing machine:
- Buy a Quality Heat Printing Machine
The first step is to buy a top quality heat printing machine. Ensure you read tons of reviews to get an idea which one is the best. We have written an article on certain buyers’ guide for the best heat printing machine.Ensure you check this article out.
Now you have your own heat transfer machine, we are going to concentrate on how to use this machine to print t-shirts.
- Choose Your Transfer
When you have your heat printing machine, you will need to choose the transfer you will press onto your t-shirt. There are tons of different transfers you can choose from. Some of them include:
- Inkjet transfers
- Laser copier/printer transfers
- Embroidered appliques and patches
- Die cut vinyl lettering
- Prepare Your Artwork
When you have your transfer paper, you will need to print a design using your transfer paper. To do this, you can use software such as Adobe Illustrator or Corel Draw. Flip your artwork horizontally using your design software to avoid a t-shirt with a flipped artwork.
- Set Up Your Heat Press Machine
Now that your artwork is ready, the next step is to set up your machine. Turn it on and adjust the settings for temperature. Depending on the type of transfer paper and fabric you are using, you can adjust the temperature to 340 degrees, 15 pounds of pressure and 29 seconds per shirt. Your timer will depend on the type of transfer paper you are using.
Note that your model and make of printing machine may vary; it is therefore recommended that you read the manual first.
- Pressing the T-Shirt
Now that you’ve powered up your machine and adjusted the settings for the work, get your t-shirt and spread it on the pressing area. Ensure that the side you want to print is facing up. Next, straighten the shirt, ensure it is not squeezed or wrinkled; else you will do a bad job.
You can make use of the tag of the shirt as a guide to find the vertical center of the t-shirt you want to print on. The aim here is to ensure you print on the center.
- Set-up the Transfer Paper
When you’ve smoothened the fabric flat, get your transfer paper and keep it face-down on top of the t-shirt you want to print. Ensure that the transfer paper is inside the pressing area. Use the armpits and tag of the shirt as a guideline. You can go ahead and cover the transfer with a handkerchief or tea towel if you want but it is not always necessary since most heat press machine come with a protective silicone pad.
- Press the T-Shirt
When you are ready to start pressing, close the press by pulling down the hot platen onto the shirt and push the hand until it clamps with a click. Ensure that the hot plate is locked down and press the start button.
- Give it Time
You will need to be patient as the heat is transferred from the machine to t-shirt. This will depend on your timer. You can set the timer between 5 to 25 seconds. Be patient and wait for the timer to countdown.
- Remove the T-Shirt
When until the timer has elapsed, open the press by gently lifting the handle to unclamp it, then use your fingernail to lift one of the lower corners of the transfer paper and use one hand to grip the corner and remove it. Once you remove the paper, you will see the image printed onto the shirt.
- Remove the T-Shirt
Gently remove the t-shirt from the platform and find a flat surface you can keep it to cool down.
Congratulations on printing your first t-shirt. Now, you can go ahead and print as many t-shirts as you want. This is fun and easy to do. Once you learn to do it correctly, you can start making money from your skills.
[jetpack-related-posts]