If you are looking for one of the best unmanned aerial vehicles, Da-Jiang Innovations aka DJI is a great ambition maker without boundaries.
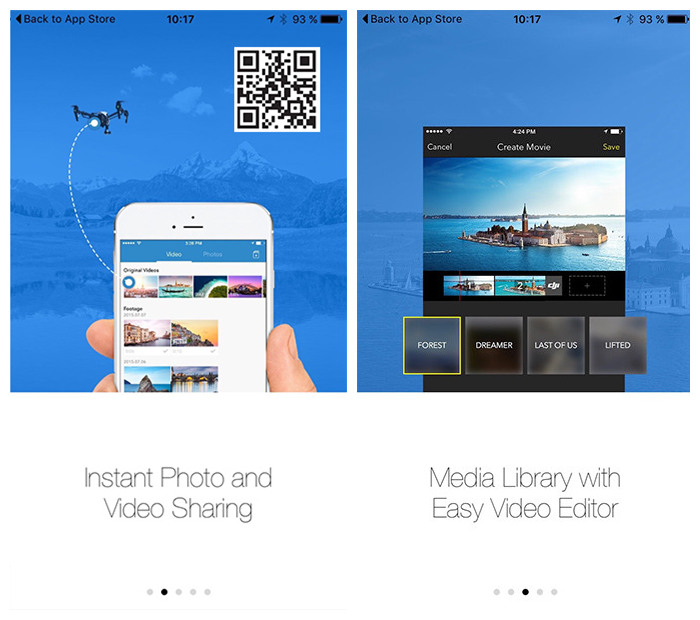
The high-class drone manufacturers have a proprietary app to fly its UAVs called DJI Go App we will be looking at how to set up the app for an excellent flying experience of your DJI drones, the Phantom 4 especially.
You can download DJI Go App on Google Play store and be ready to take control of your flying machine. You have DJI Go for drones before Phantom 4 and another one for since Phantom 4. You need to download one that is appropriate for your drone.
For DJI drones detail reviews, you may want to visit another article titled Best Drone with Camera 2017- Buyer’s Guide in 10trumps.
Let’s start!
After downloading DJI Go app on your Android phone, let’s proceed.
The basics: Turn on your DJI Go app and connect to the remote control of your drone
When you launched the DJI Go app, you need to turn on your WiFi to connect with the available device. To locate a device, tap on the search button on the right lower side of the app interface. After the search, you should see the device on the list and select your drone to go on with the setting.
After connecting your DJI Go mobile app to the remote controller, hit on Camera to see the live view of your drone. When you hit the camera for live view, DJI Go brings up the app setting, and we will proceed with our setting from here.
DJI Go MC Setting Menu
- 1. Home point settings.
You don’t have to set the start point setting because it is by default set for you when you turn on your device and it connects to the GPS and determines the appropriate setting for the instrument. But when in flight mode and you want to set the home point, you can go back and do that. - 2. Multiple flight modes.
Enabling this mode allows all the drone’s sensors and will lead to more sticky but stable flight. When you release the sticks, the drone automatically breaks the hover and stay in place following GPS guide. - 3. Return to home altitude mode.
This mode helps to safely bring your drone home if there is a breakdown in communication between the remote controller and the drone breaks down. This gets the drone to travel to desired height and return home point in a straight line, safely. It’s important to set the height you want to avoid crashing the drone because in obstructions like tree or pole. You could input like 60 or higher meters for the altitude. - 4. Maximum flight altitude.
This sets the maximum height for your drone in flight, set this to 120 meters. You can follow the US drone rules. - 5. Maximum distance away from home.
This setting may be appropriate if you don’t want your drone to go beyond a certain distance from you, but the best practice should be to keep your drone within the line of sight. - 6. Advanced settings.
Here is where you fine tune how the drone moves. You can set to achieve smoother pan and yaw movements. You need this setting for filming if you want the best shot and clearer images. What you need to set under advanced setting include the following:
a. Gain & Expo Tuning.
Setting this determines how fast turning the stick translates to movement on the drone. You need to enter a lower value to the drone slowly respond to stick movement.b. Gain & Expo tuning. Exponential curve setting allows you to ease the controller movement.
i. Sensitivity setting. You will need to check the base configuration is correct. This fine tune the
– Attitude. Defines how fast the drone will react and level out
– Brake. Sets how fast the drone will stop in GPS mode (lower value equals slower and smoother brake.
– Yaw point End. It defines the maximum stick input for yawing (lower value equals slower yaw). ii. Gain. This does the same as the Expo. It determines the reaction of the drone to external forces like air pressure and wind. The difference between Expo and Gain is that Gain only reacts to external influences like wind speed and pressure changes in the drone environment. A change in this setting may result in the drone flight dynamics. It may become unstable or wobbly.The advanced settings are for advanced flyers, and if you are not, please be careful. Best practice is leaving the setting as it were to avoid trouble. - 7. Setting the sensors.
IMU (Inertial Measurement Unit) helps to calibrate your drone for smoother flight operation. It also helps to increase the safety net including bringing your drone safely home in case of signal loss.
a. Calibrating IMUs.
There are two of them, 1 & 2. You may not touch any of these if they are not in the red. Being on green and yellow is fine!
b. Compass.
You can calibrate the compass if the color is all red. But note that you should not leave your drone on the iron surface to avoid interference. - 8. RC Signal Lost.
This is purpose built to get your drone home safely if it ever lost signal while in flight. Choose Return-to-Home to get your drone back home if the signal is ever lost. - 9. Smart Return Home.
Another interesting setting is the SMH which ensures your UAV returns home according to battery life. It provides the battery power left can bring you back home without running out of power.
Conclusion
Other important settings are necessary, the settings discussed above are crucial. You may decide to turn on or off the LEDs it depends on you.
You also need the visual navigation settings and others like RC calibration, Stick setting and other button calibrations to suit your need.
[jetpack-related-posts]

